You’ve probably seen them—those tiny, credit-card-sized boards that look like they belong in a sci-fi movie. Single-board computers (SBCs) like the Raspberry Pi, BeagleBone, or Orange Pi are the unsung heroes of the maker world. And honestly? They’re the perfect launchpad for IoT prototyping and home automation.
Think of an SBC as a tiny, fully functional computer that can run Linux, connect to sensors, and talk to the internet. It’s not just a hobbyist’s toy anymore. In fact, over 40 million Raspberry Pis have been sold since 2012—many powering smart homes, weather stations, and even industrial IoT prototypes. So, if you’re itching to automate your lights, monitor your plant’s soil moisture, or build a smart doorbell, you’re in the right place.
Why Single-Board Computers for IoT? (And Not an Arduino?)
Here’s the deal: microcontrollers like Arduino are great for simple, repetitive tasks—blinking LEDs, reading a temperature sensor, that sort of thing. But an SBC? It’s a whole different beast. It runs a full operating system (usually Linux), has USB ports, HDMI output, and Wi-Fi built-in. That means you can run Python scripts, host a web server, or even stream video from a camera. For IoT prototyping, that flexibility is gold.
Sure, you could use an Arduino for home automation. But when you want to connect to cloud platforms like AWS IoT or MQTT brokers, an SBC makes life way easier. It’s like comparing a bicycle to a compact car—both get you there, but one has a lot more room for gear.
Choosing Your First SBC: A Quick Comparison
Not all SBCs are created equal. Your choice depends on your project’s needs—and your budget. Below is a quick table to help you decide. Don’t overthink it, though. The best board is the one you actually start using.
| Board | Price (approx) | Best For | Key Feature |
|---|---|---|---|
| Raspberry Pi 5 | $60–$80 | General IoT, media centers, beginner-friendly | Fast CPU, PCIe 2.0, USB 3.0 |
| Raspberry Pi Zero 2 W | $15 | Low-power sensors, compact projects | Tiny form factor, built-in Wi-Fi |
| BeagleBone Black | $55 | Industrial IoT, real-time control | Built-in PRU for precise timing |
| Orange Pi 5 | $60 | High-performance, AI prototyping | Rockchip CPU, 8K video support |
| NVIDIA Jetson Nano | $99+ | AI and computer vision projects | GPU for machine learning |
For most beginners, the Raspberry Pi 4 or 5 is the sweet spot. It’s well-documented, has a huge community, and—let’s be honest—you can find a thousand tutorials online. Start there.
What You’ll Need: The Essential Starter Kit
Before you dive into IoT prototyping, you’ll need a few things beyond the board itself. Here’s a short checklist:
- A microSD card (at least 16GB, Class 10) for the operating system.
- A 5V power supply with at least 2.5A (don’t use a phone charger—it’ll cause weird crashes).
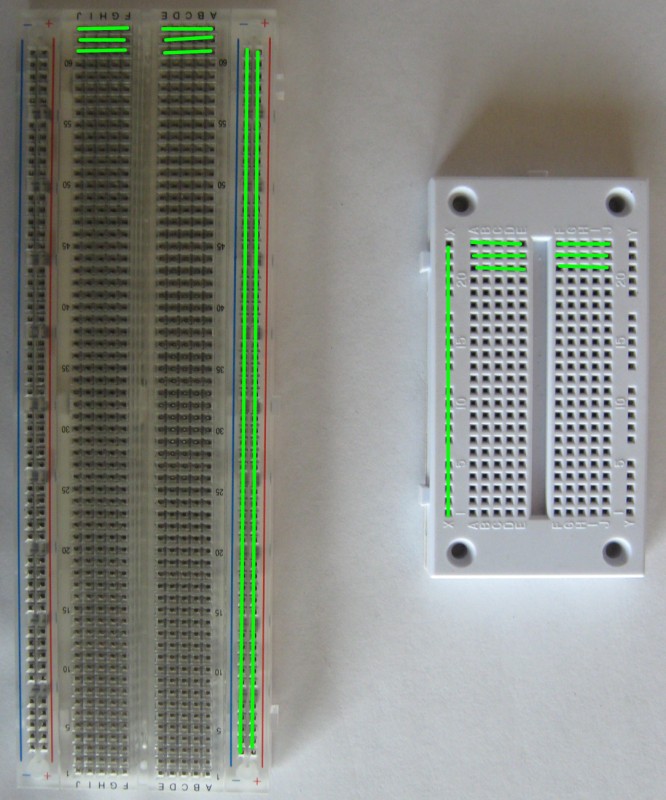
- Jumper wires and a breadboard for connecting sensors.
- Basic sensors—a DHT11 for temperature/humidity, an HC-SR04 ultrasonic sensor for distance, or a PIR motion sensor.
- An LED and a resistor (220Ω or 330Ω) for that classic “blink” test.
- A USB keyboard and mouse (or set up SSH for headless operation).
Oh, and a micro-HDMI cable if you want to see the desktop. But honestly? Most IoT projects run headless—no monitor needed. You’ll just SSH into the board from your laptop.
Step 1: Flashing the OS and First Boot
Alright, let’s get our hands dirty. First, download Raspberry Pi Imager (or Balena Etcher) and flash Raspberry Pi OS Lite—it’s the version without the desktop GUI, saving resources for your IoT code. Insert the microSD card into your computer, select the OS, and hit “Write.”
Once that’s done, pop the card into your Pi, connect power, and wait. The first boot takes a minute or two. You’ll see a rainbow screen, then a terminal login. Default credentials: username: pi, password: raspberry. Change that password immediately—seriously.
Now, enable SSH and Wi-Fi. Run sudo raspi-config, navigate to “Interface Options,” and enable SSH. Then set up your Wi-Fi under “System Options.” Reboot, and you’re ready to connect remotely.
Step 2: Your First IoT Prototype—Blink an LED (But Over the Internet)
This is the “Hello, World” of IoT. You’ll wire an LED to GPIO pin 17 (with a resistor), then control it from your phone. It sounds simple—and it is—but it teaches you the core concepts: GPIO, Python, and network communication.
Here’s the wiring:
- Connect the LED’s anode (long leg) to GPIO 17 via a 220Ω resistor.
- Connect the cathode (short leg) to a ground pin (GND).
Now, write a Python script. On your Pi, create a file called blink.py:
import RPi.GPIO as GPIO
import time

GPIO.setmode(GPIO.BCM)
GPIO.setup(17, GPIO.OUT)

while True:
    GPIO.output(17, GPIO.HIGH)
    time.sleep(1)
    GPIO.output(17, GPIO.LOW)
    time.sleep(1)
Run it with python3 blink.py. If the LED blinks, you’ve just completed your first hardware interaction. But for IoT, we need to control it remotely. That’s where MQTT comes in.
Adding MQTT for Remote Control
MQTT is a lightweight messaging protocol perfect for IoT. Think of it like a group chat—your Pi subscribes to a “topic,” and you publish commands from your phone. Install the Mosquitto broker on your Pi:
sudo apt install mosquitto mosquitto-clients -yThen, install the Python MQTT library: pip3 install paho-mqtt. Write a new script that listens for a message. When it receives “ON,” the LED lights up. When “OFF,” it turns off. You can test it using a free MQTT client app on your phone, like MQTTool.
This simple setup is the foundation for almost any home automation project. Swap the LED for a relay, and you’re controlling a lamp. Add a motion sensor, and you’ve got a security system.
Real-World Home Automation Projects You Can Build
Once you’ve got the basics down, the sky’s the limit. Here are three projects that are practical, fun, and—dare I say—actually useful around the house:
1. Smart Thermostat with a DHT22 Sensor
Monitor temperature and humidity, then trigger a fan or heater via a relay. You can log data to a cloud service like ThingSpeak and set alerts if the temp drops too low. Perfect for a greenhouse or a wine cellar.
2. Automated Plant Watering System
Use a soil moisture sensor (the capacitive kind, not the cheap resistive ones—they corrode fast). When the soil dries out, your SBC activates a small water pump. Bonus points: send a push notification to your phone so you know your basil is happy.
3. Presence-Activated Lighting
Combine a PIR motion sensor with an SBC and a relay module. When someone enters the room, the lights turn on. After 5 minutes of no motion, they turn off. It’s simple, but it saves energy and feels like magic.
Each of these projects teaches you something new—sensor calibration, timing loops, or cloud integration. And the best part? You can scale them. Add more sensors, connect to Alexa, or build a dashboard with Node-RED.
Common Pitfalls (And How to Avoid Them)
Let’s be real—prototyping isn’t always smooth. Here are a few headaches you’ll likely hit, and how to dodge them:
- Power issues: SBCs are picky about power. A cheap USB cable can cause voltage drops and random reboots. Use a quality power supply and a thick cable.
- Overheating: The Raspberry Pi 5 can get toasty under load. Add a heatsink or a small fan—especially if it’s in an enclosure.
- SD card corruption: Sudden power loss can corrupt your OS. Use a read-only filesystem for critical projects, or switch to an SSD via USB.
- Sensor noise: Analog sensors (like soil moisture) can give erratic readings. Add a capacitor or use software averaging—sample 10 times and take the median.
These are normal. Honestly, half the fun of IoT prototyping is debugging. You’ll learn more from a fried resistor than a perfect first try.
Where to Go From Here: Scaling Up
Once your prototype works on a breadboard, you’ll want to make it permanent. That means soldering a custom PCB, designing a 3D-printed enclosure, or moving to a more robust SBC like the BeagleBone for industrial use.
You might also explore edge computing