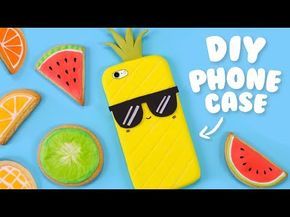
Let’s be honest—phone accessories are a racket. You walk into a store, see a case for $40, and it’s just… plastic. A bit of silicone, a snap-on back, and boom, that’s a week’s worth of coffee. But here’s the thing: you don’t have to play that game. With a little time, some basic supplies, and maybe a glue gun you forgot you owned, you can build stuff that’s better, cheaper, and way more you.
I’ve been down this rabbit hole for a while now. Not because I’m cheap (okay, maybe a little), but because nothing off the shelf ever fits my vibe. My phone is an extension of my personality, right? So why should it look like everyone else’s? Let’s walk through some projects that range from stupid-simple to slightly ambitious. You’ll probably mess one up. That’s fine. That’s part of the fun.
Why Bother Making Your Own Accessories?
Well, besides the obvious cost savings, there’s the customization factor. You can match your phone to your bag, your shoes, your mood on a Tuesday. And honestly? The process is kinda therapeutic. It’s like cooking instead of ordering takeout—you control the ingredients, the quality, and the final taste. Plus, you get to say “I made that” when someone asks where you got your cool little phone grip.
But let’s not pretend it’s all roses. Some DIY projects flop. I’ve made a case that fell apart in a week. I’ve glued my fingers together more times than I’d like to admit. But the wins? They stick around. And they cost me like, five bucks instead of thirty.
Project 1: The Clear Case That’s Actually Yours
You’ve seen those clear cases with photos or dried flowers inside, right? They sell for a premium online. But here’s the secret—you can make one in about twenty minutes. Start with a basic transparent TPU case (get a pack of three for under $10 on Amazon). Then, grab some printed photos, magazine cutouts, or even pressed petals. Cut them to size, arrange them on the back of your phone, then slide the case over. Done.
Wait, one tip—use a matte Mod Podge or a thin layer of clear tape over your images before inserting. Otherwise, they might slide around. Learned that the hard way. My favorite? A polaroid of my dog, slightly off-center, with a washi tape border. Looks intentional, feels personal.
What You’ll Need
- Clear TPU phone case (not the hard plastic kind—too rigid)
- Scissors or an X-Acto knife
- Photos, magazine clippings, or dried botanicals
- Clear tape or Mod Podge for sealing
- Patience (you’ll need it for alignment)
The beauty here? When you get bored, just swap the images. The case is reusable. That’s a win in my book.
Project 2: DIY PopSocket Alternative (The “Grip Ring”)
PopSockets are great, but they’re also… everywhere. And they break. And they cost $15 for a piece of plastic with adhesive. Instead, try this: buy a pack of metal phone rings (the kind that stick to the back) for a few bucks. But don’t just stick it on—decorate it first.
Wrap the ring with embroidery floss or thin washi tape. Add a tiny bead or a small charm that dangles. Or, if you’re feeling fancy, paint the ring with nail polish to match your phone case. The adhesive is strong enough to hold, but the look is totally custom. I did one with a tiny leather tassel—took me five minutes, and people ask about it constantly.
Pro Tip for Adhesion
Clean your phone back with alcohol first. And after sticking the ring, press firmly for 30 seconds. Let it cure for an hour before you actually use it. Otherwise, it’ll pop off when you’re mid-scroll. Trust me.
Project 3: Custom Charging Cable (Braided and Beautiful)
Here’s a project that sounds harder than it is. You know those paracord bracelets from summer camp? Same concept, but for your charging cable. Get a cheap, thin USB-C or Lightning cable, and some paracord or even colorful shoelaces. You’re going to braid the cord around the cable. It’s a bit fiddly at first, but once you get the rhythm, it’s meditative.
Why bother? Because standard cables are ugly, they tangle, and they break at the ends. Wrapping them adds a layer of protection and makes them look like something from a boutique. Plus, you can color-code your cables—red for the bedroom, blue for the car, whatever fits your system.
The Easiest Method
- Cut a length of paracord about 1.5x the length of your cable.
- Tie a knot near the USB connector end.
- Start wrapping the cord tightly around the cable, leaving no gaps.
- When you reach the other end, tie another knot and trim the excess.
- Add a dab of super glue on the knots to keep them from slipping.
That’s it. You’ve got a durable, one-of-a-kind cable that won’t look like everyone else’s at the airport. And if you use glow-in-the-dark paracord? Well, that’s just showing off.
Project 4: The Wallet Case That’s Not a Wallet Case
I hate bulky wallet cases. But I also hate carrying a separate wallet when I’m running to the store. Solution? Make a slim card holder that attaches to your phone’s back. You can do this with a piece of felt or leather, some strong double-sided tape, and a bit of stitching (or fabric glue if you’re lazy like me).
Cut a rectangle of leather (an old belt works great), fold it into a pocket shape, and glue the edges. Then attach it to your phone case with heavy-duty adhesive. It holds two cards and a folded bill. That’s it. No bulk, no zippers, no fuss. And when you get tired of it, peel it off and make a new one.
Project 5: Upcycled Phone Stand from… a Binder Clip?
You know those big black binder clips? The ones you have in a drawer somewhere? They make perfect phone stands. Clip the binder clip onto a stack of sticky notes or a thick book, then rest your phone in the metal handles. It’s not pretty, but it works. However, if you want it pretty, spray-paint the clip gold or copper. Takes ten minutes and looks like a designer desk accessory.
Or, go a step further: glue two small magnets to the clip’s arms. Then you can attach it to any metal surface—your fridge, your car door, a gym machine. Instant hands-free viewing, anywhere. Cost? About a dollar.
What About Materials? Where to Get Cheap Supplies
You don’t need a craft store haul. Check your junk drawer first. Old phone cases, broken cables, shoelaces, and fabric scraps are gold. Thrift stores have leather jackets you can cut up for next to nothing. Dollar stores sell adhesive, paint, and washi tape. Honestly, the most expensive part of these projects is usually the glue gun refills.
| Project | Estimated Cost | Time Needed | Difficulty |
|---|---|---|---|
| Custom Clear Case | $5 – $10 | 20 mins | Easy |
| Decorated Grip Ring | $3 – $5 | 10 mins | Super Easy |
| Braided Cable | $4 – $8 | 30 mins | Medium |
| DIY Card Holder | $2 – $6 | 45 mins | Medium |
| Binder Clip Stand | $1 – $3 | 15 mins | Easy |
Common Mistakes (and How to Avoid Them)
First, don’t use hot glue for anything that touches your phone directly. It leaves residue and can damage the coating. Use a glue gun for stands or non-phone parts only. Second, measure twice, cut once—especially with leather or fabric. I’ve ruined a few good pieces by being hasty. Third, don’t skip the curing time for adhesives. I know you’re excited, but wait the full hour. Your future self will thank you.
And one more thing—if you’re using spray paint, do it outside. Or at least in a well-ventilated garage. Your kitchen counter will not appreciate the overspray. Not that I know from experience or anything.
Making It Last: A Few Maintenance Tips
DIY stuff isn’t built to last forever, but you can extend its life. For clear cases, avoid leaving them in direct sunlight for hours—they’ll yellow. For braided cables, don’t yank them out by the cord; pull from the connector. And for any glued-on accessory, check the adhesion every few weeks. A dab of super glue can fix a loose edge before it becomes a lost piece.
There’s something satisfying about using something you made with your hands. It’s not perfect. It might have a slight wobble or a tiny air bubble. But that’s the charm. It’s yours. No one else has it. And when your friend asks where you got that cool phone grip, you get to say, “Oh, this? Made it last night.” That feeling? Better than any store-bought accessory.
So grab some supplies. Clear off your desk. And make something that’s unapologetically you. The only limit is your glue gun’s temperature.